

One of the most potent weapons in any makeup regimen is concealer. The right application method can make all the difference whether you want to conceal undereye shadows, lessen redness, or hide acne. But learning how to apply concealer is not always easy, particularly when you are battling obstinate dark circles or acne scars.
This blog will discuss step-by-step blending concealer tips to help you get flawless skin. From selecting the ideal color to merging like a pro, we will go through everything you need to know. Whether you're a novice wanting to improve your regimen or just beginning, these pointers will help you strengthen your concealer game as never before.
Beyond a concealer, it's a weapon. It illuminates weary eyes, balances your skin tone, and creates a perfect foundation for the rest of your makeup. You need to know how to apply concealer properly, though, if you want that smooth, natural finish.
Unlike foundation, which spreads over wide surfaces, concealer seeks particular problem areas. But only if used correctly, a little goes a long way. The secret is to customize your strategy based on knowledge of the skin problems you're addressing.
Preparing your skin is essential before using any concealer. Moisturize your face; if you have dark circles, pay particular care to the undereye region. Good hydration improves concealer blendability and persistence.
Use a thin eye cream under the eyes. This gives the product a smooth foundation and stops it from sinking into small lines. Apply a light, non-greasy moisturizer to avoid exacerbating acne if you are concealing flaws.
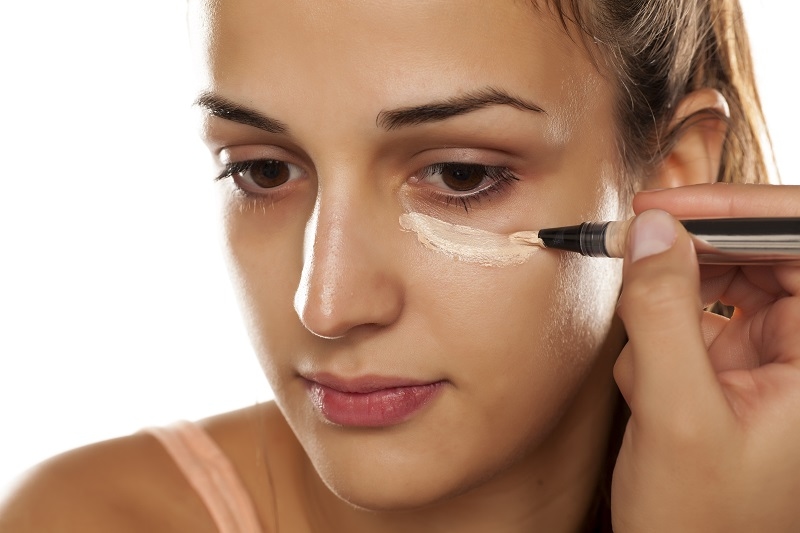
Using a color correction guide is among the most efficient ways to improve the performance of your concealer. Color correctors are tinted creams that negate particular pigmentation prior to concealer application.
Here is a brief analysis:
Once you apply the corrector, let it set for a few seconds before layering on your concealer. Particularly if conventional concealer alone doesn't seem to solve the issue, this color correcting guide is very useful.
Finding the ideal concealer for acne scars or dark circles depends on your skin type and the problem you are trying to address. Choose a hydrating, light composition for dark circles to avoid creasing. On the label, look for terms like "brightening" or "illuminating."
A fullcoverage, matte concealer typically helps with texture or blemishes. These usually stick to the skin and remain in place all day. Try a few recipes if you are unsure where to start to see which mixes in naturally without seeming cakey.
Choose a hue that precisely matches your foundation if you want a concealer for acne scars. Lighter colors should be avoided on blemishes as they will draw attention rather than mask the imperfections.
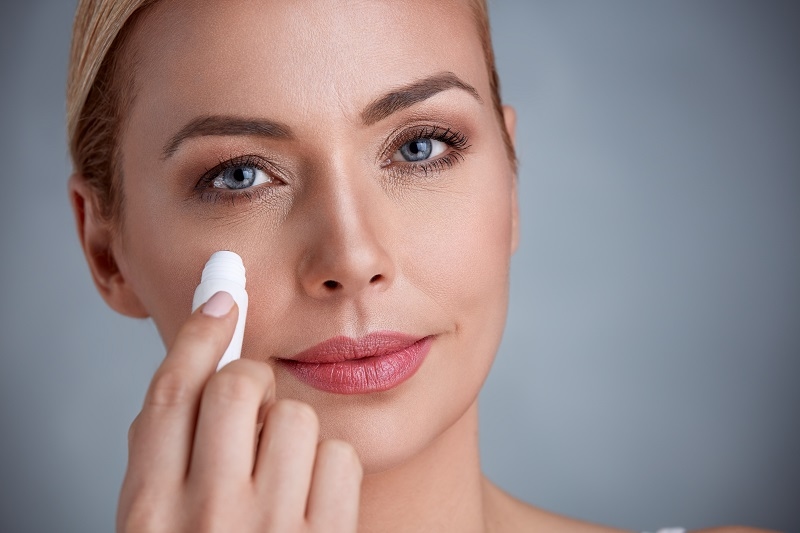
Soft and Blurred, the under-eye area is fragile. This is the correct way to do under-eye coverage makeup to cover dark circles:
You can always add more, so start with less.
This approach provides immaculate undereye coverage makeup that brightens and disguises without seeming heavy. Thick layers should be avoided as they will sink into lines and exacerbate dryness.
A different method is needed to cover breakouts. The skin near blemishes can be flaking or raised, thus accuracy is crucial. Here is how to use concealer on acne-prone spots:
Selecting the ideal concealer for acne marks calls for a formulation that gives a natural matte finish without clogging pores. Many companies are now presenting noncomedogenic choices meant only for acne-prone skin.
Mixing separates flawless and patchy concealer most of all. Smooth transitions are absolutely vital, whether you are correcting scars or working on your under-eye region.
Some must-know blending concealer advice follows:
These blending concealer techniques enable you to prevent the dreaded "makeup mask" and give your skin a genuine and revitalized appearance.
After your concealer is applied and blended, it's time to lock it in. Lightly set the region with a fine-milled translucent powder and a little brush. For undereyes, move gently to avoid creasing. More powder will help the product stick to scars.
For a more natural look, some people choose setting sprays. Either way, sealing your job guarantees long-lasting coverage and keeps the material from moving throughout the day.
Some behaviors might negate your efforts even if you understand how to use concealer. Common errors and their fixes are listed below:
Preventing these easy mistakes will help to significantly improve the look and performance of your concealer throughout the day.
Focus on illuminating the eyes and spot concealing if you need a fast cure, yet are short on time.
This is a two-minute concealer regimen:
Without a full face, this fast approach provides you with natural undereye coverage makeup and fresher-looking skin.
Many alternatives are available; hence, don't give up if your first concealer choice falls short. Certain formulas are better for specific occasions. You might need the best concealer for dark circles under your eyes and an additional product for blemish coverage.
Look for concealers that offer:
It's vital to test goods under natural light. Under natural light, a concealer that appears wonderful in store lighting might appear too pale or too orange. Before committing to a full-size tube, ask for samples without hesitation.
Knowing how to properly apply concealer can totally change your cosmetic practice. The correct tools, methods, and items make all the difference whether you are addressing tired eyes or concealing acne scars. Your goal is to accentuate your features and increase your confidence rather than conceal your skin.
Anyone can learn the art of concealing with some little practice, a simple color correcting chart, and some blending concealer techniques. Keep in mind that even the most effective concealer won't do much unless your skin is prepared and your application is accurate.
This content was created by AI